Do you have a favourite toy? What story does the toy tell us about you? Sew a toy pig, inspired by a special toy in our collection.

Did you know ...
The National Museum of Australia has many toys in its collection. These toys help tell stories about people, their travels and the way people lived in the past.
One of our favourite toys is a much-loved pig with a missing tail. This toy pig tells the story of Erin Craig who won the pig as a prize on board a ship in 1946.
Erin and her mother were sailing from Australia, to meet her father in the United States, just after the Second World War. Erin treasured the pig for more than 60 years.
Can you imagine one of your toys being in the Museum’s collection? What is its story?
How to make your own toy pig
These instructions are for a small toy pig, which can be sewn by hand.
Skill level: ★★★ Challenging — you may need an adult to help cut and sew
Time: 40 minutes plus (depending on your skill level and design)
Ages: 7 years and up
This is a fun project to do with an adult or an older family member.
Materials
- paper pig template
- two pieces of fabric for the body, approximately 20 x 20cm each. We suggest linen or cotton. Felt may be easier for younger children.
- toy stuffing (available at sewing shops or use scrap material from home)
- embroidery thread or cotton
- buttons, felt or fabric pens for the eyes (optional)
- scissors
- needles
- glue
- pins.
Remember: scissors, pins and needles are sharp! Ask an adult for help if needed.
- Download Small toy pig — A4 template62.3 kb pdf [ PDF | 62.3 kb ]
Step 1
- Gather your materials.
- Print the small pig A4 template on paper. You can also draw your own freehand pig template.
- Cut out the paper template pieces.
Step 2
- Create the parts. Pin the paper template to the fabric and cut around the outside of the paper template.
- Once cut out, you should have two pieces of fabric for the body and two pieces for the ears.
Step 3
Our pig has no eyes. They may have fallen off over time, or were left to the imagination. If you choose to make eyes for your pig you can do this by:
- sewing on two buttons
- embroidering two eyes
- drawing eyes on with fabric pens
- gluing on two felt dots.
Step 4
- Add the ears. Sew one ear to one body, and then repeat on other side.
- If you want a challenge, try different stitches to create different effects. Cut the thread or cotton into shorter lengths, about 25 cm. This stops it from getting tangled.
Tip: If you are learning to sew, you might like to try different stitches on scrap pieces of fabric first.
Step 5
- Add a tail. Erin's pig had a tail, though it was lost over time. We made a tail by plaiting thread and sewing it on.
Step 6
Sew the body. This takes a lot of sewing. Take your time and keep at it! If you know how to sew on a machine, or you have an adult who can use a sewing machine — you may choose to sew the body using a machine.
- Pin the two sides of the body together.
- Sew the edges around the body. Remember to leave an opening for stuffing.
Step 7
- Stuff the inside of the pig and sew the remaining gap closed.
- This pig is finished, but if you like, you can continue to decorate it.
Large pig template option
We also have a large pig A3 template option. This larger pig can be made easier on a sewing machine. We recommend 34 x 34 cm of fabric for the large pig.
- Download Large toy pig — A3 template57.5 kb pdf [ PDF | 57.5 kb ]
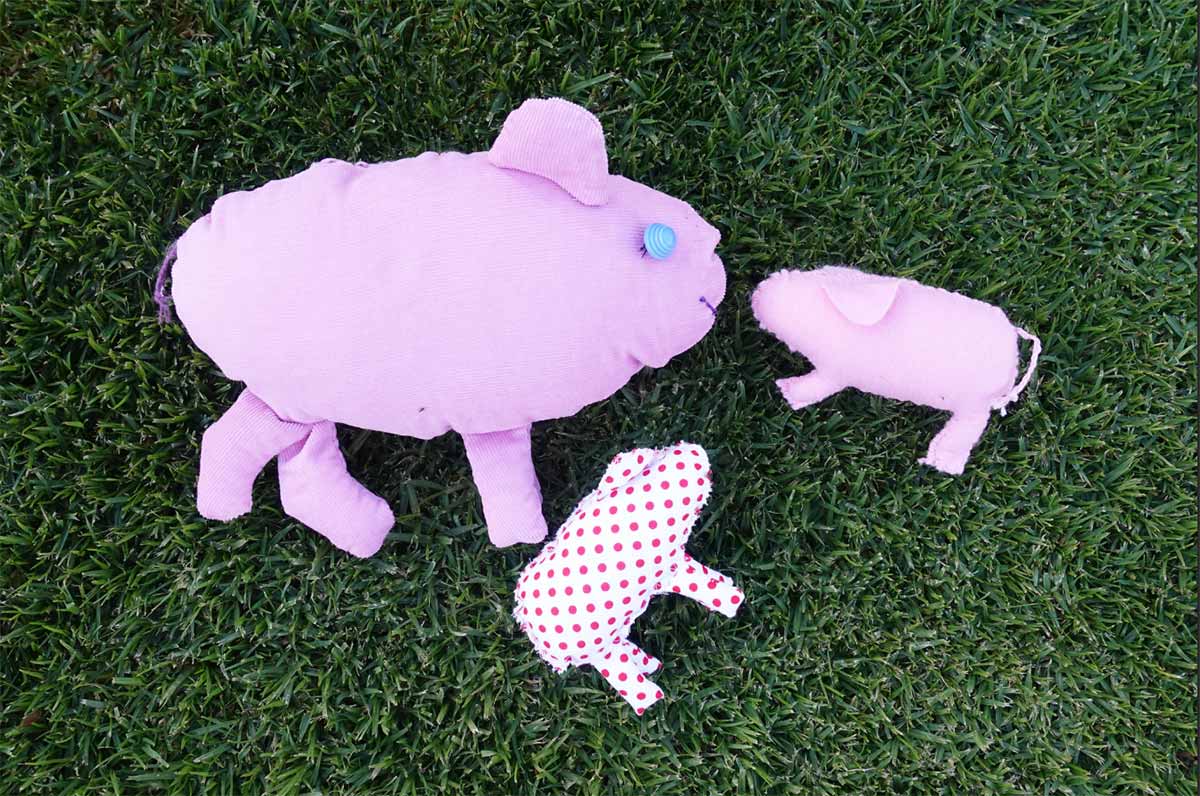
Here are some of our completed pigs, with the larger option on the left. You can see the plaited tail on the pig on the right.