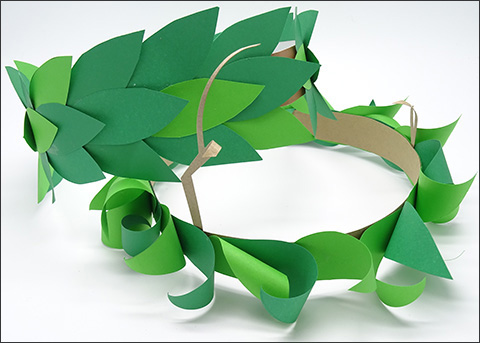
Create your own Roman laurel wreath like some of the laurels seen in the Rome: City and Empire exhibition from the British Museum.
Did you know ...
Laurels are traditionally made by weaving and twisting leaves from the laurel or bay tree (Laurus nobilis) into a circular shape.
The Romans took many ideas from Ancient Greek mythology, including wearing a laurel like that worn by the Greek god Apollo.
Laurels were worn at the Olympic Games as a symbol of victory and honour.
Roman emperors such as Julius Caesar wore laurels to show importance and godly status.
The Romans ruled over Europe for nearly 2000 years and created great cities and a vast empire. Did you know that today laurel wreaths are still worn in Italy at important events such as graduation ceremonies?
How to make a Roman laurel wreath
Skill level: ★★ Moderate – you may need an adult helper when using scissors or staplers
Time: less than 30 minutes
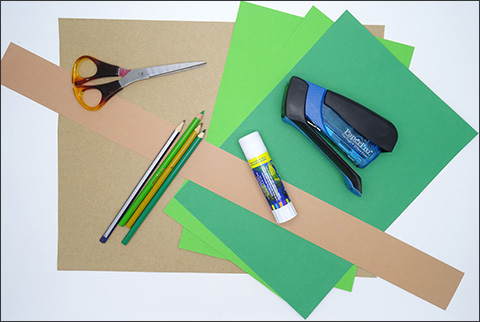
What you need:
- long strip of paper to make a head band
- coloured paper for the leaves
- pencils for drawing
- scissors and glue
- stapler for joining your wreath.
Step 1
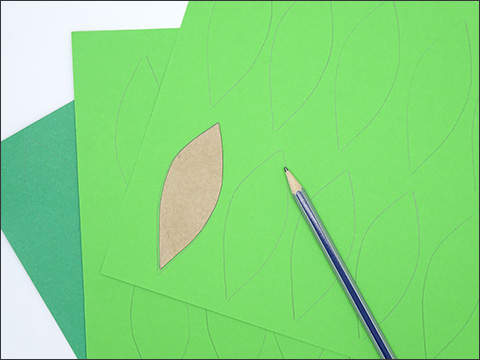
Laurel leaves are long green, oval-shaped leaves, which taper to two pointy ends.
- Draw a leaf shape onto paper. Cut this leaf out.
- Use the first leaf you made (brown in the picture at right) as a template.
- Trace around this leaf onto the coloured paper, at least 20 times. We used light green and dark green paper, but you can use any colour. You could try making a golden laurel wreath.
- Cut out your leaves. This can take a while so maybe a friend or an adult can help you.

- To make your leaves look more interesting, you can colour them and add veins.
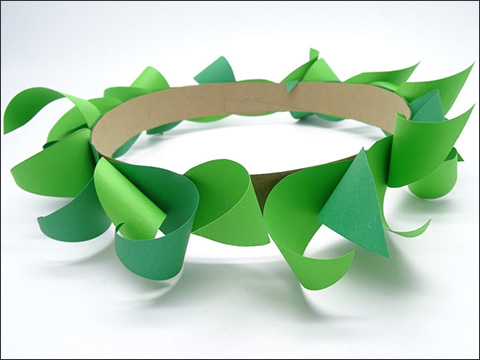
Tip: Before adding your leaves to the wreath, curl them around a pencil and give the leaf a natural twist.
Or you can keep your leaves flat and layer them on top of each other (see wreath pictured at the top of this page).
Step 2
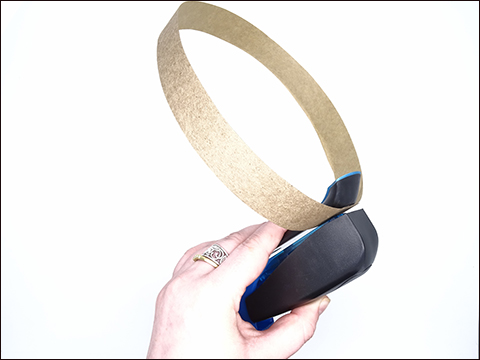
- Make sure the paper strip that’s going to form the head band for the wreath fits your head.
- Lay the paper head band strip out.
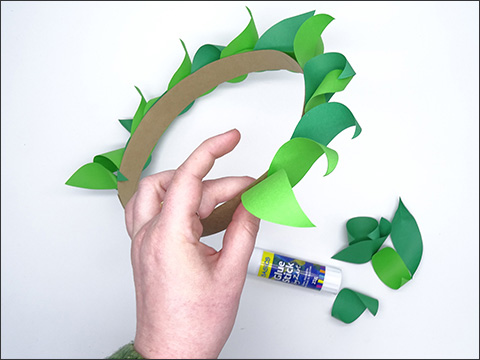
- Plan how your leaves will sit on the band. Do you want the leaves to overlap? Do you want them to look ordered or randomly placed?
- Staple together the ends of your head band. You may need help with this.
- Staple or glue your leaves onto the band one at a time.
Tip: Make sure the sharp ends of the staples face the outside of your head band, so they don’t get caught in your hair.
The laurel we made was inspired by a coin showing Emperor Julius Caesar. You can see it on the British Museum website
Have fun with your design. You can add extra elements, like small sticks, flowers and berries.
You could add a knotted bow to the back of the wreath to symbolise ties of state and the people of Rome, as worn by Roman leaders.
Or try making a wreath with real leaves!
Share your creation
We’d love to see your creation by emailing us a photo to: programs@nma.gov.au