Make a piece of wearable art inspired by the amazing fashion and textiles in the exhibition Piinpi: Contemporary Indigenous Fashion.
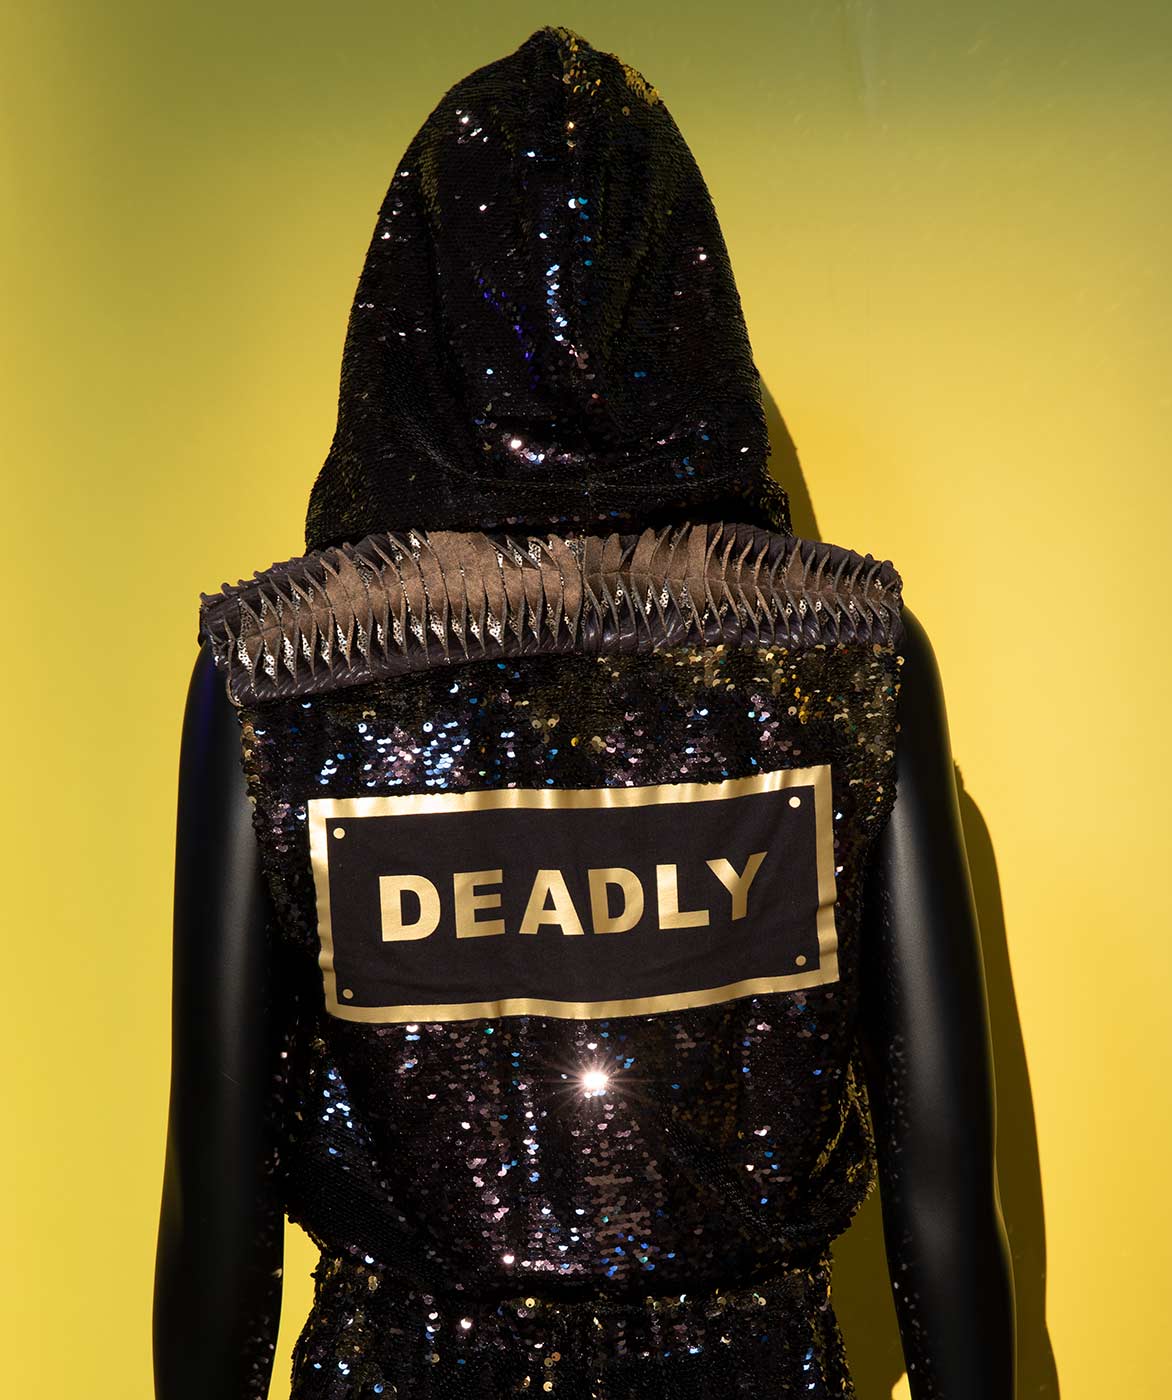
The exhibition included a jumpsuit by talented First Nations artist Teagan Cowlishaw, with her signature Deadly print. Can you make your own patch of wearable art at home? Will you sew it to your jeans or attach it to another piece of clothing?
About the artist

‘My name is Teagan Jan Cowlishaw and I am a Nyikina woman with paternal connections to Bardi and Nyul Nyul people on the Dampier Peninsula, WA. My grandmother’s family name is Hunter.
‘I am a textile artist and fashion designer with events management background. My First Nations heritage led itself to the naming of my brand AARLI, which means fish in Bardi language.
‘My Nana used to say, I was like a barramundi, how they are able to blend from saltwater to freshwater – as a next generation I had the ability to blend between white world and blak world.
‘What is ‘Deadly’ you ask? Deadly is Aboriginal Australian slang for awesome and great!’
How to make your own Deadly wearable art
Skill level: ★★ Moderate – you may need an adult to help to get started
Time: 45–60 minutes
Ages: 5 years and up
We have 2 versions of this activity. Depending on what you have at home, you can make a painted or fabric pen version of your patch.
Painted Deadly patch
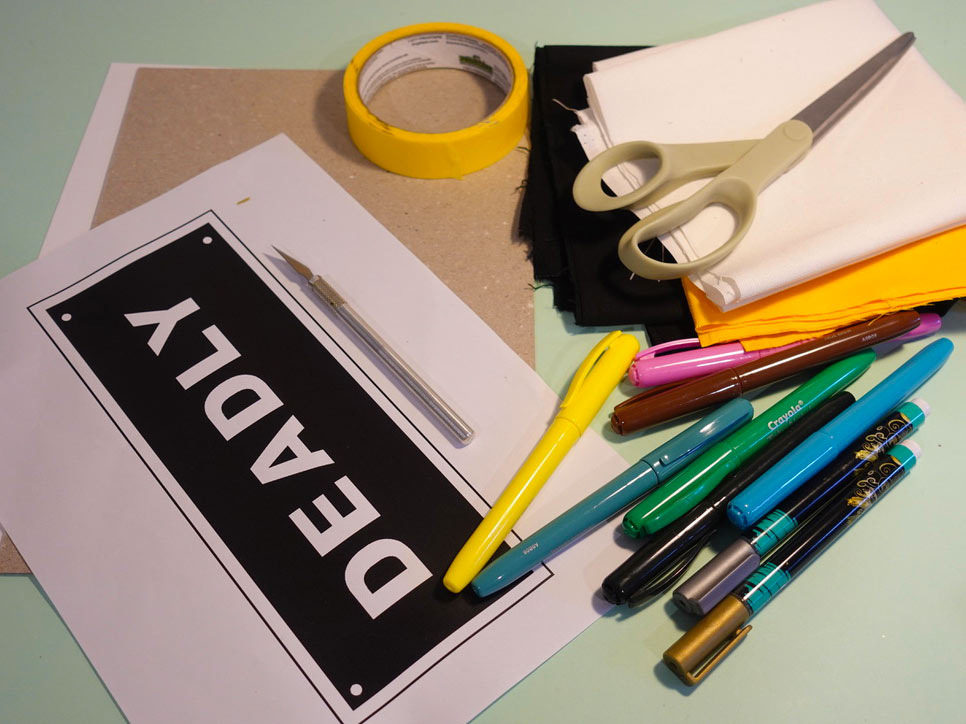
What your need:
- Deadly stencil (print on A4 paper from the PDF below)
- cotton fabric – 10 x 25cm
- scissors or cutter
- pen or marker
- tape
- acrylic paint – we used fabric paint
- water bowl and palette – we used an old takeaway container
- paint brush or a sponge
- disposable gloves
- large piece of card or something to protect your worktable
- needle and thread or 4 safety pins.
- Download Deadly stencil44.7 kb pdf [ PDF | 44.7 kb ]
This activity was designed in collaboration with Teagan Cowlishaw and is based on her ‘Deadly nameplate’ trademark. This Deadly stencil is for personal/non-commercial use only.
Step 1
- Gather your materials.
- Print the Deadly stencil on to a piece of A4 paper. If you don’t have a printer, ask an adult to help you draw the outline of the Deadly text.
Tip: We used white fabric but any colour will do. Choose a paint colour that will stand out on your fabric colour.
Step 2
- Stick your Deadly stencil print to the cardboard with tape to keep it in place.
- Ask an adult to help you cut out the white Deadly stencil letters.
Note: These photos were taken with an earlier version (a prototype) of the Deadly stencil so your printed stencil will look a little different but the steps are the same.
Step 3
Cut out a piece of fabric about 10 x 25cm.
Step 4
- Clear a space to work. We used a table.
- Tape a large piece of card, newspaper or vinyl down to protect the table.
Step 5
- Turn your Deadly stencil over.
- Put your fabric over the centre of the cut out Deadly stencil.
- Tape fabric to the back of the stencil to keep it in place.
- Turn the stencil and fabric over and tape it to the table.
Step 6
- Prepare your paint. We used an old takeaway container as our water bowl. The lid was our palette.
- Put on disposable gloves.
- Place one small scoop of paint on the lid.
Step 7
- Put a small amount of paint on the sponge. You can always add more later.
- Dab the sponge into the paint a few times on the lid. This evens the paint out and stops it being too wet.
Tip: Don’t use too much paint. It might ‘bleed’ under the stencil and go outside the cut-out letters.
Step 8
- Very gently and a little at a time, dab the paint sponge onto the cut-out word. It’s best to put the paint on slowly.
Step 9
- Let the paint dry a little. We waited 20 minutes but drying time depends on the paint used.
- Remove the tape and take the stencil off your fabric.
- Set the fabric aside to dry while you clean up.
Step 10
- Once completely dry, ask an adult to iron the fabric.
- To keep the iron clean, place a scrap or cotton fabric over your printed Deadly patch and iron this.
- The heat helps the paint stick to the fabric.
Artist’s tip: Teagan uses a silk screen or Riso printing technique for the Deadly print. These techniques allow her to print many patches. Did you notice Teagan made her print in reverse so the area around the letters is printed, not the letters?
Step 11
- Fold under the fabric edges and hand stitch them. Or ask an adult to overlock the edges. This will stop the edges from fraying.
- Use 4 safety pins to attach your Deadly patch. That way you can use it on different pieces of clothing.
- You could also sew your patch onto a piece of clothing.
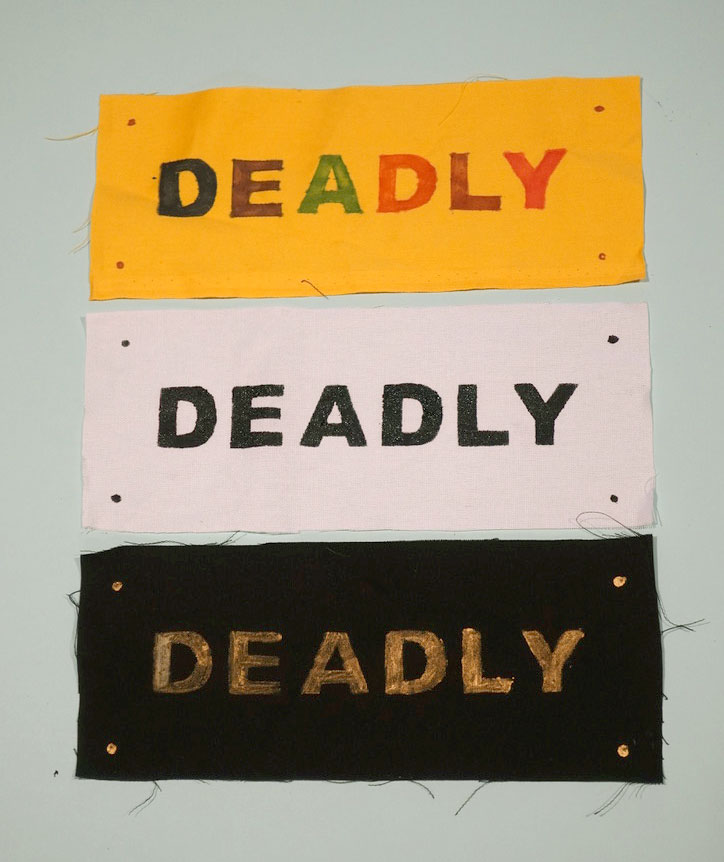
- You could also add more texture and layers to create patterns. We enjoyed trying different designs on our Deadly patches, at right.
Fabric pen Deadly patch
What you need
- Deadly stencil – print from the PDF above
- cotton fabric – 10 x 25cm
- fabric pens
- scissors or cutter
- tape
- needle and thread or 4 safety pins.
Steps 1 to 3
Follow steps 1 to 3 for the painted Deadly patch above.
Step 4
- Tape your fabric piece on the back of the stencil cut-out.
Step 5
- Think about your design – what colour do you want to make your letters? Can you decorate and draw on the rest of the patch? Or will you keep it like Teagan’s with the bold Deadly word and one colour on the fabric background.
- Choose fabric pens and fill in the letters. You can colour this in solid with a single colour, add patterns or just trace the outline of each letter.
Tip: The Piinpi artists are inspired by the seasons and the world around them. Can you design a pattern that has meaning to you?
Step 6
- Remove the tape and carefully remove the Deadly stencil.
- See step 11 above, on how to finish off and attach your Deadly patch.
Share your creation
We’d love to see your creation by emailing us a photo to programs@nma.gov.au
Find more fun at home family activities and videos on YouTube