Design and make your own bike sculpture, inspired by the exhibition Freewheeling: Cycling in Australia.
How to make a mini bike sculpture
Let your imagination run free. Can you recall when you learnt to ride? Think about what bikes mean to you and how they help us move around, stay fit and have fun.
Skill level: ★★ Moderate – you may need an adult to help
Time: 40 minutes
What you need:
- four plastic lids
- hole punch or a hammer and nail
- pipe cleaners
- drinking straws
- thin wire
- pliers
- metal pins, glue and tape
- hole punch or a hammer and nail.
Steps 1–2
These steps are a guide. You can use any materials that you want! We used lids and wire but you can use paper and glue, craft wood and tape, or other recycled materials from your home.
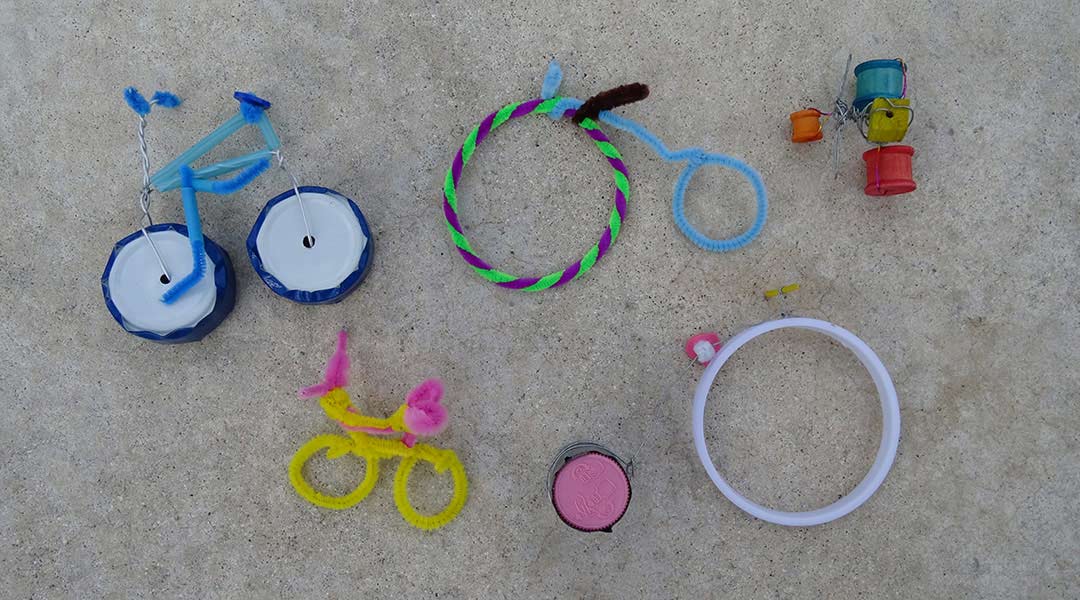
- Explore different types of bikes on our Freewheeling website. Can you see the penny-farthing, dragster and trike in the picture of our creations above?
- Gather your materials. Think about the parts of a bike – wheels, handlebars, seat and frame – and any extra parts to add to your creation.
Step 3
- If you are using plastic lids for wheels, ask an adult to put a hole in the centre of the lids with a hole punch or nail and hammer. We used two lids taped together to make one wheel.
Step 4
- Insert wire through the hole in the wheel. Make a frame by bending the wire. Twist wire to join.
Steps 5–6
- Thread pieces of straw on to another piece of wire to form a frame and handlebars. Attach the wheels to the frame by twisting the wire. Bend a pipe cleaner into a V shape to make pedals.
- Attach the pedals by twisting around the centre of the frame. Fashion a seat and handgrips from pipe cleaners or tape. Play with your toy bike. Make a collection to share with family and friends!
Share your creation
We’d love to see your creation by emailing us a photo to: programs@nma.gov.au