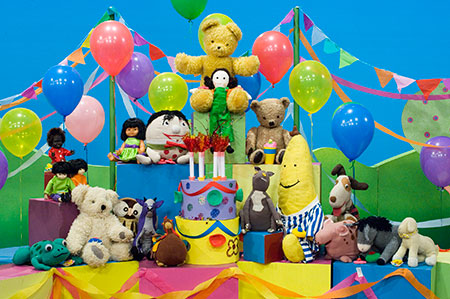
Make an episode of Play School with a box TV and a drawing of your favourite toys or a story on a scroll. This activity was inspired by the Happy Birthday Play School: Celebrating 50 Years exhibition.
How to make a box TV
Skill level: ★★★ Challenging – you may need an adult to help
Time: 1–2 hours
What you need:
Box TV construction:
- TV template PDF, printed onto 6 x A4 sheets of paper
- large piece of card, about 60 x 90 cms
- glue
- utility knife or box cutter
- cutting mat
- metal ruler
- clear sticky tape or double-sided tape
- pen to draw and score foldable lines.
Storyboard scroll:
- storyboard scroll template PDF, printed onto A3 paper
- 2 x cardboard tubes (like cling wrap rolls), at least 33 cm long.
Decoration:
- glue, sticky tape, scissors
- patty pans
- coloured markers, crayons or pencils
- sticky tape or double-sided tape
- pipe cleaners or straws, if you want an aerial
- lids or buttons for TV knobs
- stickers.
- Download Storyboard-scroll-template.pdf13.0 kb pdf [ PDF | 13.0 kb ]
- Download Box-TV-template.pdf54.1 kb pdf [ PDF | 54.1 kb ]
Step 1
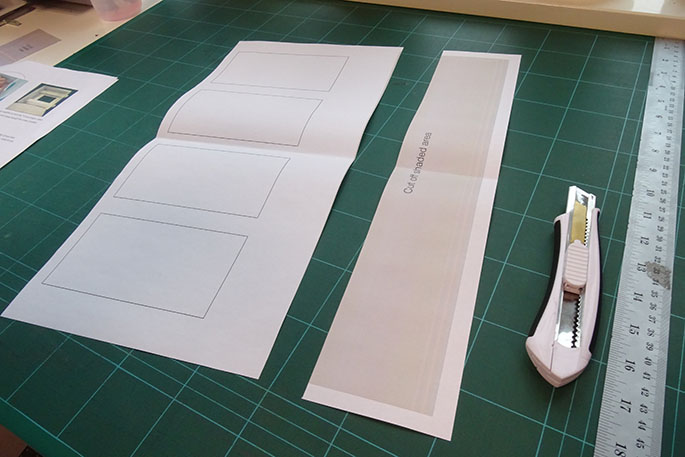
Gather materials and print the TV template on six sheets of A4 paper. Use scissors to trim each sheet as marked.
Steps 2–3
- Lay the six template sheets out on a large sheet of card, in two rows, matching the numbers 1–4. Glue into place.
- Ask an adult to cut around the template, using a utility knife on a cutting mat. Cut out the shaded rectangle and circles.
Steps 4–6
- Test your cardboard tubes in the circles and adjust to size.
- Score, or trace over the dotted lines using a ruler and ballpoint pen and being careful not to pierce the card.
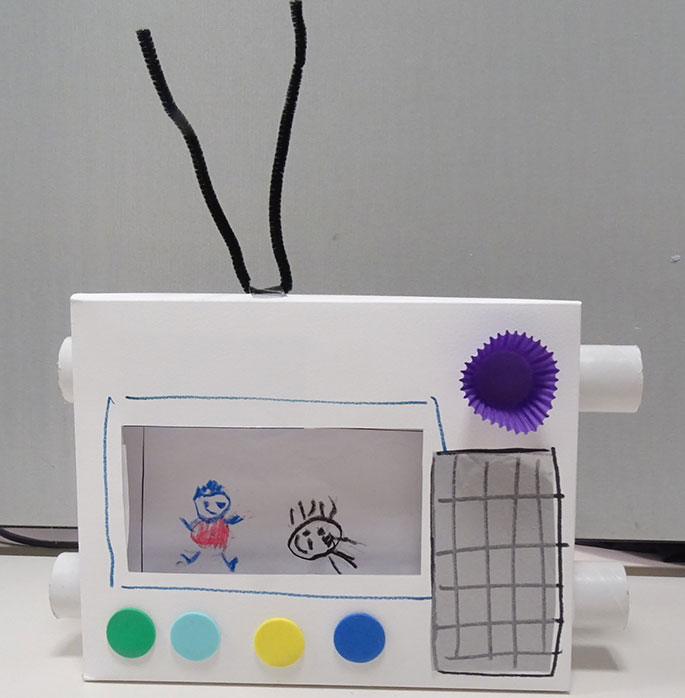
- Turn the card over and add decorations around the rectangular TV screen. Glue on knobs or draw on speakers. Check out some pictures of old TVs or have fun with your imagination.
Steps 7–9
- Turn the card over and start to form the box TV shape, after folding along the dotted lines you scored earlier.
- Tape into place, leaving the back flap open so you can insert your storyboard scroll later.
- Insert the two tubes through the holes on either end of the box TV.
How to make your storyboard scroll
Think about what type of episode you want to show on your TV.
Will it be Play School toys, presenters, windows, clocks or yourself? Who will you invite to watch your TV show? What do you think they would like to see? This might help you put your story together.
Step 1
- Print out the storyboard scroll template PDF onto A3 paper.
Step 2
- Ask an adult to cut off the shaded area of the storyboard scroll sheet. This will help it fit inside the box TV.
Step 3
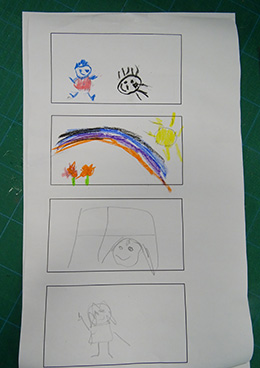
- Draw your episode inside the storyboard rectangles. Think of each rectangle as four separate scenes, working from first at the top, to last at the bottom.
- If you want to make a longer episode, tape more A3 sheets to the bottom and keep drawing.
Step 4
- Ask an adult to help insert the completed storyboard scroll face down into the box.
Step 5
- Check that you can see the storyboard drawings through the front of the cut out TV screen. Check it lines up neatly and that the pictures are not upside down.
Step 6
- Once in place, tape the top of the storyboard scroll to the top tube. Wind the storyboard around the top tube until the end of the storyboard is at bottom tube, then tape that in place. The tension on the storyboard should be tight.
Step 7
- Fold the back of the TV into place and tape it up to enclose your episode.
- Now you can scroll through your episode by winding the tubes. Don’t forget you will need to rewind first. Invite your family and friends to watch your show!
Share your creation
We’d love to see your creation by emailing us a photo to: programs@nma.gov.au